Monday, June 29, 2009

Graduation #3: Sig-O's graduation/Red Velvet Cupcakes


This is the third and last graduation of the graduation season. This is certainly not the least significant graduation, mind you (not that there is a least). My sig-o was graduating! Yep. With two majors and a minor (management). He's going to be displaying two, count them, TWO diplomas in his future office - one in biology and the other in chemistry. I was so happy for him. What a wonderful day I was able to meet most of his immediate family and enjoy two meals with them. I enjoyed getting to know his young cousins and his younger brother.
Since his graduation, about two weeks ago, he has landed a job at the same company I work in, which is such blessing, considering the state of the current economy. We aren't in the same location, however, but we're only about 4 miles apart.

To celebrate this event of my wonderful sig-o who is always there for me and who can almost solve all of my problems, I had to bake something equally as wonderful. I decided to bake a classic red velvet cupcakes recipe with cream cheese buttercream frosting. I chose these because I knew they would not be too sweet, just in case not everyone has as much of a sweet tooth as I do. For a little extra touch, I made some cupcake toppers with a photograph I took of him at Disneyland, complete with graduation cap and ears!
Congratulations again, my dear sig-o!

Red Velvet Cupcakes adapted from The America's Test Kitchen Family Baking Book

2 1/4 cups (11 1/4 oz.) all-purpose flour
1 1/2 tsp. baking soda
Pinch of salt
1 cup buttermilk, room temperature
2 large eggs
1 tbsp. white vinegar
1 tsp. vanilla extract
2 tbsp. natural cocoa powder (not Dutched-processed)
2 tbsp. red food coloring
12 tbsp. (1 1/2 sticks) unsalted butter, softened
1 1/2 cups (10 1/2 oz.) sugar

1. Adjust an oven rack to the middle position and heat the oven to 350 degrees. Grease two 12-cup muffin tins or line with cupcake liners.

2. Whisk the flour, baking soda, and salt together in a medium bowl. In another medium bowl, whisk the buttermilk, eggs, vinegar, and vanilla together. In a small box, mix the cocoa and red food coloring together to a smooth paste.

3. In a large bowl, beat the butter and sugar together with an electric mixer on medium-high speed until light and fluffy. Reduce the mixer speed to low and beat in one-third of the flour mixture, followed by half of the buttermilk mixture. Repeat with half of the remaining flour mixture and the remaining buttermilk mixture. Beat in the remaining flour mixture until just combined. Beat in the cocoa mixture until the batter is uniform.

4. Give the batter a final stir with a rubber spatula to make sure it is thoroughly combined.

5. Pour each cupcake cup 2/3 full. Bake the cupcakes until a toothpick inserted in the center comes out with a few crumbs attached, 15-20 minutes, switching and rotating the tins halfway through baking.

6. Let the cupcakes cool in the tins for 10 minutes, then transfer them to a wire rack to cool completely.

Cream Cheese Buttercream Frosting adapted from Sky High

Note: By the time I finished making the frosting, it was slightly soft. I had to chill it in the freezer for a few minutes before I was able to use it on the cupcakes.

12 oz. cream cheese, slighly chilled
1 stick plus 6 tbsp. (7 oz.) unsalted butter, at room temperature
1 cup confectioners' sugar sifted after measuring
2 tsp. vanilla extract
1 cup granulated sugar
1/4 cup water
3 egg whites

1. Place the cream cheese in a mixer bowl and beat on medium speed until slightly fluffy and smooth. Add the butter 1 to 2 tbsp. at a time, mixing until smooth. Add the confectioners' sugar and vanilla and mix until fluffy. Set this aside at room temperature while the buttercream is prepared.

2. To prepare the buttercream, combine the granulated sugar and water in a small heavy saucepan and bring to a boil over medium heat, stirring to dissolve the sugar. Continue to cook, without stirring, until the syrup reaches the soft-ball stage, 238 degrees F on a candy thermometer.

3. Meanwhile, put the egg whites in a mixer bowl and have the mixer set up and ready to go. When the syrup is ready, turn the mixer to medium-low and begin mixxing the egg whites. Slowly add the hot syrup to the whites, taking care not to pour it directly onto the beaters, or it may splash. When all of the syrup is incorporated, raise the speed to medium-high and beat until the egg white mixture has cooled to body temperature and a stiff meringue forms.

4. With the mixer on low speed, begin adding the cream cheese mixture by the spoonful. When all is incorporated, raise the speed to medium and whip until the frosting is smooth and fluffy.

5. Pipe or spread onto completely cooled cupcakes.

Monday, June 22, 2009

I ♥ Faces. Let's Hear it for the Boys

Since I've started this blog, I have learned so much about photography. Photography used to be a main hobby of mine when I was in high school, but since then, it's been put on the back burner. Now, since I've graduated and have some time after work, I have picked it back up again, along with a few other hobbies (this blog).


I came across this blog, I ♥ Faces a few months ago and I've been addicted. It contains great tutorials and features wonderful amateur and professional photographers from all over. The blog focuses on capturing moments purely through faces (hence, I ♥ faces). They have weekly photography contests, varying in themes, and a kids category and an adults category.

This week, I have decided to enter (my very first time!). The theme is "Let's Hear it for the Boys" (very appropriate for the recent Father's Day). For my entry, I will be entering a portrait shot of my sig-o, which I am very proud of (and so is he, but he doesn't want anyone to know). This was taken on a whim at Disneyland one afternoon, and I just love it!


Be sure to head on over to www.iheartfaces.com to check out all of the beautiful face entries this week!

Sunday, June 21, 2009

Great American Bake Sale Recipe #1: Chocolate Chip Cookies

For the Great American Bake Sale I had a few weeks ago, I had to make up my mind about what to bake. Now, I tend to be very ambitious and think that I have more time than I really do. I also think that I'm a faster worker than I really am and almost never anticipate that anything will go wrong. Of course, with work occupying most of my time, I have very little time, I am a slow worker, and something goes wrong (or shall I say, something unexpected happens) almost every time I bake. Well, this time was no different. Even something as simple as chocolate chip cookies somehow made my heart drop at least once during the process of production.
I decided to make six different items (if I am counting correctly) for the bake sale. Looking back, I wonder how I pulled it off, but I did. Let the record show, however, I did not go without help. For the sake of time, a few days before the bake sale, I decided to make all the cookie dough. I rolled them into balls, placed them on a cookie sheet, froze them, and then transferred them to a zip lock bag and froze them until I wanted to use them. The night before the bake sale, I simply took them out of the freezer, and baked them without thawing them, which turned out just fine. Before getting to that "just fine" stage, let me mention that I was not the one doing the baking. I was instructing my sig-o, who I thought was attentive and careful, to perform the steps above (take out of the freezer, put on cookie sheet, bake). He looked at the balls, looked at me and said, "Wow, these are fool proof". He spoke too soon. You see, he spaced the dough balls on the cookie sheet just fine, with my approval, and placed the sheet in the oven at the right temperature and time and everything. When he took them out, I told him to transfer the cookies from the sheet to the cooling rack with a spatula. I turned my back and then I heard "Ooops" or was it "Uh-oh". I cringed and slowly turned around. He was in the process of transfering the cookies to the cooling wrack, but some how managed to miss and the cookie went sliding down the rack, in between the wire. Cookie 1, goodbye. After he learned not to do that, the rest of the batch went fine.
If I were to poll 10 people of the five top items that should be in a bake sale, I think undboutedly chocolate chip cookies would be in one of those five, everytime. In other words, a bake sale would not be complete without chocolate chip cookies (I seemed to overlook that it would not be complete without rice crispy treats either, which a customer so kindly pointed out, but seeing that it is not one of my most favorite dessert items, it didn't even cross my mind) so that is the first recipe that I will start out with.

I have made plenty of chocolate chip cookies during my baking days, using numerous recipes, and add-ins, and such, but this recipe trumps them all. It was delicious and soft and chewy, just the way I like it.

Chocolate Chip Cookies adpated from The America's Test Kitchen Family Baking Book

2 cups plus 2 tablespoons (10 2/3 oz.) all-purpose flour
1/2 tsp. baking soda
1/2 tsp. salt
12 tbls. (1 1/2 sticks) unsalted butter, melted and cooled
1 cup packed (7 oz.) light brown sugar
1/2 cup (3 1/2 oz.) granulated sugar
1 large egg
1 large egg yolk
2 tsp. vanilla extract
1 1/2 cups (9 oz.) semisweet chocolate chips

1. Adjust an oven rack to the lower-middle position and heat the oven to 325 degrees.

2. Whisk the flour, baking soda, and salt together in a medium bowl.

3. In a large bowl, beat teh melted butter and sugars together with an electric mixer on medium speed until smooth, 1 to 2 minutes. Beat in teh egg, egg yolk, and vanilla until combined, scrpaing down the bowl and beaters as needed.

4. Reduce the mixer speed to low and slowly add the flour mixture until combined.

5. Mix in the chips until incorporated.

6. Working with 2 tbls. of dough at a time, roll the dough into balls and lay them on a baking sheet, spread about 2 inches apart.

7. Bake the cookies, one sheet at a time, until the edges are set and beginning to brown but the centers are still soft and puffy, 15 to 20 minutes, rotating the baking sheet halfway through baking.

8. Let the cookies cool on the baking sheet for 10 minutes, then serve warm or transfer to a wire rack and let cool completely.

Monday, June 15, 2009

Banana Chocolate Chip Cupcakes with Peanut Butter Glaze

I bought a few cake baking books a few weeks ago. Like every recipe book I ever get, I thumbed through each page slowly, admiring the photos, reading the tips, and ingredients. I feel like I picked the cream of the crop with these books. They are so helpful and they cover so many of my questions. Did I mention that I love these books? I was excited to try them all! Yep. All! The problem was, where do I start? I needed a sign. Something to let me know that it is the right recipe to begin my adventures with these books with.
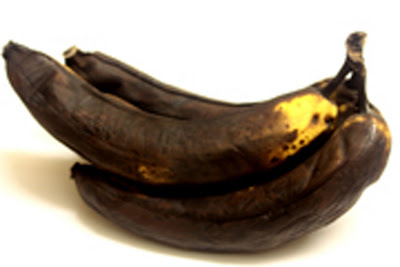
Then, I hear a voice yelling from downstairs saying, "Is anyone going to eat these bananas? I'm going to throw them out! Why doesn't anyone eat fruit? I buy them for you to eat, not to look at!" I rush down the stairs and take a look at these bananas. To my delight, they were completely black. Now, I cannot let these perfectly black, sweet, and oh so ripe bananas go to waste, now could I? I had to use them in some kind of cake recipe. I was able to quickly recall a recipe for cupcakes that required bananas and chocolate chips, which of course the combination of these two cannot go wrong. I reserve the bananas for the next day and make sure I have all the ingredients I need.
They turned out delicious. The banana flavor was not overpowering and there was just the right amount of chocolate chips. For the topping, I figured something with peanut butter would accommodate the banana and chocolate flavor very well. I looked at what I had in the refrigerator and came up with the glaze below. For the garnish, I picked up a bag of dried bananas, which I think adorned the little creations very nicely.
Banana - Chocolate Chip Cake adapted from Sky High

To make this into a cake, please take note of the italicized text below.

Note: If you cannot find Chinese five-spice, simply increase the cinnamon to 1 1/2 tsp.

2 1/4 cups cake flour
1 1/3 cups plus 3 tablespoons sugar
1 1/4 tsp. baking powder
1 1/4 tsp. baking soda
1 tsp. ground cinnamon
1 tsp. Chinese five-spice powder
1/2 tsp. salt
1 stick (4 ounces) plus 1 tbsp. unsalted butter, at room temperature
1 cup mashed very ripe bananas
2 ripe but firm bananas, thinly sliced (for cakes)
3 eggs
3/4 cup buttermilk
1 1/2 tsp. vanilla extract
3/4 cup mini semisweet chocolate chips
1 1/2 cups heavy cream (omit for cupcakes)
Caramel drizzle (see below; omit for cupcakes)
Dried banana chips

1. Preheat the oven to 350 degrees F. Line cupcake tins with liners, butter and flour the tins, or spray with non-stick cooking spray. For cakes, butter the bottoms of three 8-inch round cake pans or coat with vegetable cooking spray. Line the bottom of each pan with a round of parchment or waxed paper and butter the paper.

2. Place the flour, 1 1/3 cups sugar, baking powder, baking soda, cinnamon, five-spice powder, and salt in a large mixing bowl. With an electric mixer on low, blend well, about 1 minute. Add the butter and mashed bananas and beat until well blended. Raise the mixer speed to medium and beat until light and fluffy, about 3 minutes.

3. Combine the eggs, buttermilk, and vanilla in a small bowl and whisk to blend. Add to the batter in 3 additions, scraping the bowl well and beating just until blended after each addition. Finally, fold in half of the chocolate chips by hand. Fill each cup 2/3 full. For cakes, divide the batter among the 3 prepared cake pans. Sprinkle the remaining chocolate chips on top.

4. Bake the cupcakes for 15-20 minutes, or until a cake tester or wooden toothpick inserted in the center comes out clean. For cakes, bake the cake layers for 25-28 minutes, or until a cake tester or wooden toothpick inserted in the center comes out clean. Let cool in the pans for 10 to 15 minutes, then invert to unmold onto wire racks. For cakes, carefully peel off the paper liners and let cool completely before filling and frosting.

Glaze for cupcakes:

6 oz. semi-sweet chocolate chips
2 tblsp. smooth, unsalted peanut butter
2 tblsp. unsalted butter

Microwave in 10 second increments until melted and smooth, stirring after 30 seconds.

Caramel drizzle for cake

1 cup prepared thick caramel squce
3 tbsp. dark rum

Put the caramel sauce in a small heavy saucepan and warm over low heat, stirring, just until heated through, about 2 minutes. Remove from the heat and whisk in the rum. Let cool to room temperature before using.

Filling for cake

In a large chilled bowl with chilled beaters, whip the cream with the remaining 3 tablespoons sugar until stiff.

Assembly:

For cake: To assemble the cake, place one layer, flat side up, on a cake stand or serving plate. Top with 2 to 3 tablespoons of the caramel drizzle and spread it thinly but evenly over the whole layer. Arrange about half the banana slices on top in a single layer. Cover the bananas with 1 cup of the whipped cream, spreading it evenly over the layer. Repeat with the second layer, adding more caramel, bananas, and cream. Place the final cake layer on top and coat it with 2 to 3 tablespoons of caramel; reserve the remaining caramel to serve with the cake slices. Top with the remaining whipped cream and spread it evenly over the entire layer. Decorate the top with chocolate chips and a few more banana slices.


For cupcakes, make the glaze in a wide mouth, slightly deep bowl. Dip the cupcakes into the glaze, taking care to cover as much area as desired. Quickly garnish with dried banana chips before glaze hardens.

Saturday, June 06, 2009

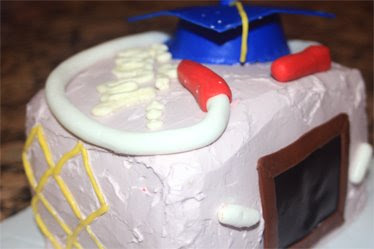
May's Graduation Cake

Graduation #2 and counting. My friend, May, just graduated with a Bachelor's in Human Development. She is now on her way to becoming an elementary school teacher.
I have known May since high school and we've come a long way since then. She is one of the kindest and most caring people I know. She is also excellent at crafts; her detail and creativity is impeccable and flawless. We have seen each other go through so much and we have grown into our own together. I know that she will be an excellent teacher and I can't wait to see her do great things.
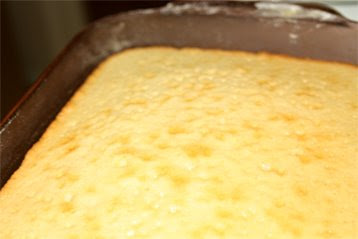
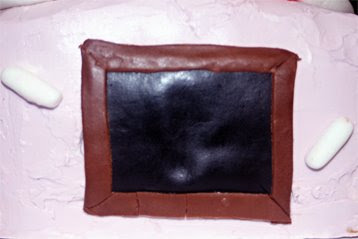
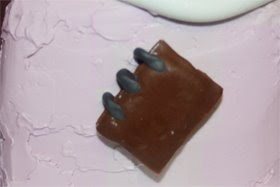
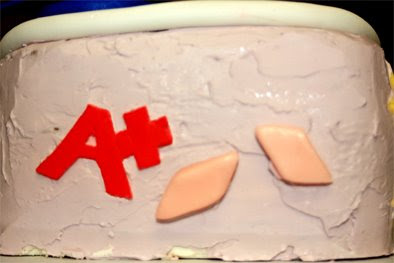
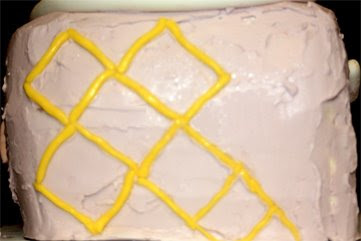
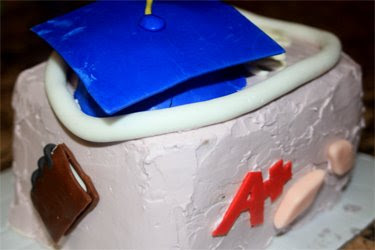
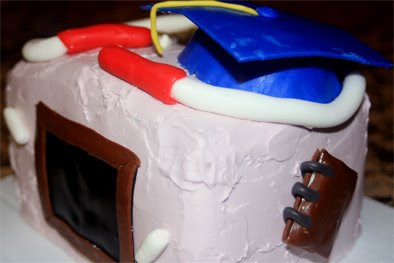
May was having a dinner party after her graduation and I decided to bake her a mini cake. It was about time I tried a new cake recipe and this was the perfect opportunity. This was also the first time I attempted to work with fondant. Because she's going to be a teacher, I figured I would decorate the cake accordingly. Well, Duff won't be hiring me any time soon, but I don't think my attempt was a complete failure either.
The day of the graduation was definitely hectic. I woke up early in the morning to bake the cake, make the filling and the frosting. As I was walking out the door to attend the ceremony, I was still assembling the cake itself. Once the ceremony was over, I still had a little bit of time before the dinner party. After pictures and taking my sister to a friend's house, I ran back home to begin making items out of the fondant and finish the assembly.
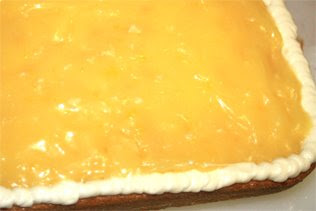
Hectic? Yes. But, completely worth it. I loved the cake's flavor, along with its lemon curd filling. Fondant was also fun to play with. I always loved playing with play-doh as a little girl and this was not only like play-doh, it was edible!

I found this recipe from Art of Dessert, a blog that I have been following for the past couple of months.

Vanilla Butter cake adapted from Art of Dessert

I used a lasagna pan for this cake, which I had to adjust the time for. I began checking the cake at 25 minutes and then kept checking every five minutes until it was done.

If you're making cupcakes, I would fill the cups 2/3 full and then baking for 15 -20 minutes.

1 1/2 cups butter, softened to room temperature
2 1/4 cups sugar
5 large eggs
1 tsp. vanilla extract
3 cups flour
1 tsp. baking powder
1/4 tsp. salt
1 cup milk

1. Preheat oven to 325 degrees F.

2. Grease and flour two 8-inch or 9-inch pans.

3. Beat together butter and sugar till light and fluffy. Slowly add eggs one at a time then pour in vanilla extract.

4. Sift together flour, baking powder and salt.

5. Alternately add the flour mixture and milk.

6. Pour into prepared pans. Bake for 35-40 minutes or until a toothpick inserted in the middle of the cake comes out clean.

7. Cool completely in the pan before inverting the cake onto a cooling rack.

Lemon Curd adapted from Art of Dessert

1 tbsp. unflavored gelatin with 3 tbsp. water
3/4 cup lemon juice
zest of 1 lemon
4 large eggs
1 3/4 cup sugar
1/2 cup butter, cut into cubes

1. In a small bowl, sprinkle the unflavored gelatin over the water. Set aside.

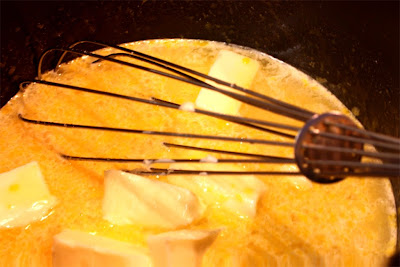
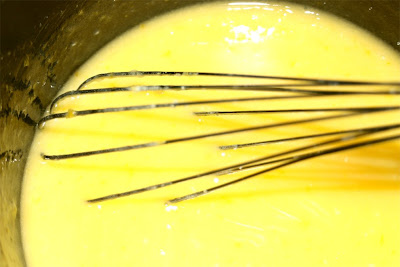
2. Mix together lemon juice, lemon zest, eggs, sugar and butter in a saucepan. Cook over medium heat, stirring constantly, until it starts to thicken.

3. Remove from heat then add the unflavored gelatin. Mix until gelatin is dissolved completely.

4. Refrigerate for a few hours before using.

Hybrid buttercream frosting
adapted from Art of Dessert

1 cup butter, softened to room temperature
2 cups powdered sugar
2 tsp vanilla extract
1/2 cup warm milk
1/4 cup cold whipping cream
red and black food coloring (gel or paste works best)

1. Beat the butter, powdered sugar and vanilla extract at low speed until combined.

2. Slowly add the warm milk. It will separate at first, but don't worry - give it a few minutes and it will start coming back together. Increase the speed a little to whip it up a bit.

3. Slowly pour in the cold whipping cream. Whip for a few more minutes and it should start to look smooth. It may curdle or separate again when you pour in the whipping cream, but give it some time and it will smooth out again.

For cake assembly

1. Have all the layers ready before beginning assembly.

2. Fill each layer except for one layer with the lemon curd.

3. Stack the layers on top of each other, with the unfilled layer being the top layer.

4. Apply a thin crumb coating (to set all the crumbs into the cake) by mixing a little bit of water with a portion of the frosting.

5. Frost the entire cake with the left over, undiluted frosting.

6. You could decorate the cake to your taste by leaving it the way it is, tinting some frosting, or taking a stab at fondant.

Enjoy!