Tuesday, March 31, 2009

Wine Tasting


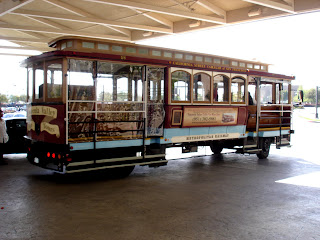
This past weekend, as part of my birthday week of gifts, my sig-o and I took a trip down to Temecula for a wine tasting tour. We had the pleasure of being escorted around town in an authentic, fully-restored San Franciscan cable car that drove us to four different wineries, with a picnic lunch scheduled during the middle of the day. We chose a great day to visit Temecula. It was bright and warm most of the day, allowing for a great view of the beautiful green hills and the newly developed neighborhoods. Living in the hustle and bustle city of L.A. really had a hand in how much I appreciated the serene and relaxing city of Temecula.
Anyone who knows me will know that I am not a drinker, not really by choice, but from an experience that I don't care to re-live again (use your imagination, people). As I get older, though, I would like to train my palette for much more sophisticated flavors. The extent of my wine experience, before this tour, was go to a restaurant, peruse their wine list, and point to my selection, almost blindly. It was usually a hit or a miss. From this tour, I discovered the kind of wine I like (white, sparkling, sweet, fruity) and the kind that I didn't like (red, port, dry). The deals that each winery was offering to the individuals on the tour were incredible - some were selling bottles for $10 each! Though it was tempting to grab such a deal, realistically speaking, I am not yet the person who comes home and pours myself a glass of wine to unwind after a hard-working day. For now, I am satisfied knowing that I will be able to choose a glass of wine that will satisfy my palette whenever I dine at a nice restaurant that will allow for a nice wine pairing.
Among the four wineries visited (South Coast Winery and Vineyards, Wilson Creek Winery and Vineyard, Oak Mountain Winery, and Frangipani Winery), South Coast Winery and Vineyards was my favorite. Situated on 400 acres of greenery, it was a full resort and spa and I could see myself returning for special events or just a weekend of relaxation. The first tasting of the day at South Coast Winery and Vineyards was the Spumante Diamante and was perfect for a beginner like myself.
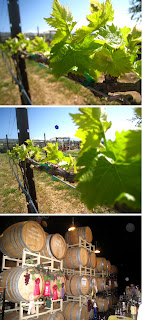
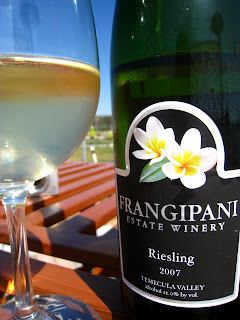
Though I did have a favorite winery, each of the other wineries had their pros as well. Wilson Creek Winery and Vineyard sat on beautiful land, culminated with a gazebo, had an intriguing almond champagne. Oak Mountain Winery, a smaller winery, had unique selections, my favorite being the following: 2005 "No Oak Chardonnay", 2007 For Pete's Sake White, and Brut Champagne. Finally, the last stop of the day, Frangipani Winery, had a very delicious and refreshing 2005 Grenache Rose (I could see myself sipping this by a pool on an upcoming hot summer day) and oddly enough, a batchi ball court where they hold tournaments.
For those of you who are just beginning to venture into the wonderful world of wine, I suggest and encourage taking a wine tasting tour in the vicinity of your area. A tour will make the learning process less intimidating, less overwhelming, and will help you get the most education outside of your own research.
Monday, March 23, 2009

Last Minute Cookies


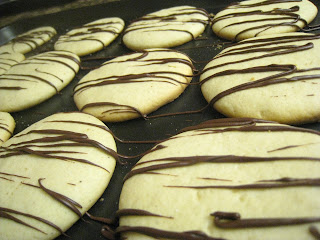
Do I have a life? I think I do seeing that I'm always busy with something. Well, apparently my sometimes wonderful sister doesn't think I have a life. You see, a few days ago, in the middle of the afternoon, my sister called me and demanded (I mean, asked) me to bake something for a bake sale at school the next day. Hmmm...thoughts raced through my head about all the things I had to do that afternoon and how quickly I would have to finish them in order to squeeze baking in. Not having the heart to say no because 1) it was my sister and 2) it was for a good cause (they were raising money for some students to be able to take an educational trip to Costa Rica during spring break). I spent the rest of the afternoon trying to decide what to bake, while simultaneously thinking about the other dozen things floating around in my mind. Did I want to go all out and bake something really time consuming like a cheesecake or cupcakes? Or should I go with a more simple approach like some kind of cookie dough? Well, seeing that I didn't get to it until 8:00pm, I opted to go with the latter. I chose a sugar cookie recipe that I was already familiar with (this was no time to experiment, people). They're easy to handle and they don't spread as much as other cookies such as chocolate chip, which means placement on the cookie sheet would be effortless. To make it seem like a lot of time and energy was spent on perfecting these creations, and to make her cookies more distinguishable than other plain ol' sugar cookies that might be there, I decided to "sweeten" up the cookies by adding some streams of chocolate. I think they turned out pretty well for something that was thrown together last minute (last minute meaning I didn't know about it more than 48 hours in advance). Their size came out just about right - not too big to be overwhelmend, and not too small to feel like you're paying for something that you will finish in one bite.


I got the report on how well they sold...success! There were only two cookies left!


All in all, even though it was last minute and I was caught off guard (I'm a planner!), everything turned out alright.

Just so my sister doesn't seem like a complete brat, it must be known that she did do the clean up after I was done with the kitchen, in spite of the two tests that she needed to study for, the following day.

Wednesday, March 18, 2009

Two-Bean Tamale Pie

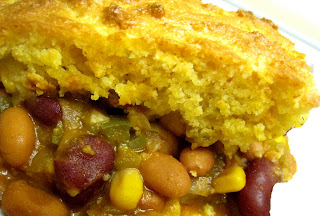
I love tamales (especially cheese and green chile) and I love pie, but together? May I say, "Yummy, yummy goodness"? I needed to give this recipe a try. This recipe intrigued me because it contained no meat, which fits my sister's criteria, it sounded very hefty and filling (I pictured sort of a shepherd's pie looking thing), and the ingredients were very simple (most from a can)!
I made a list of the ingredients that I didn't already have and ran out to the store with a friend during our lunch break. In record time (a little less than 1 hour), we were able to visit two destinations! After work, I came home and began the minimal prep work that entailed. The enjoyment of this meal came not only from its consumption, but also from the cooking process. I loved the vibrant colors and the unique flavor of each of the ingredients being thrown into the pot. Because the pot contained so many ingredients, it was really difficult to mess it up. This recipe is basically fool proof! Really! You would really have to want to mess it up in order to ruin it. I must have walked away from the pot for minutes at a time and it still prevailed!
The finished product satisfied my visual discernment. Now for the palette. It's flavor was very similar to chili and cornbread (makes sense because there was cornbread and the staple ingredients of chili), kind of like a chili and cornbread casserole. This worked out because I happen to love chili and cornbread (or even rice), especially on a cold and wet day. To add a little something extra, as a person who loves a little kick in most of the meals I eat, I added a splash of hot sauce to my slice of this very satisfying meal.

This recipe was submitted by Sarah Eskestrand from Denver, Colorado, Truman State University to The Healthy College Cookbook.

Ingredients:
Cooking spray
1 tblsp. vegetable oil
1 green bell pepper, seeded and chopped
1 onion, chopped
2 garlic cloves, minced
1 (15-ounce) can kidney beans, rinsed, drained, and slightly mashed
1 (15-ounce) can pinto beans, rinsed, drained, and slightly mashed
1 (16-ounce) can whole-kernel corn, drained, or 1 cup frozen or fresh corn kernels
6 ounces vegetable juice
1 (4-ounce) can diced green chiles
1 tsp. chili powder
1/2 tsp. ground cumin
1 (8.5-to 10-ounce) package corn bread mix
1/2 cup shredded cheddar cheese
Chopped fresh cilantro or parsley

Directions:

1. Preheat the oven to 400F. Coat a 2-quart baking dish with cooking spray.

2. Heat the oil in a large skillet over medium heat. Add the green pepper, onion, and garlic and saute 3 to 5 minutes, until tender. Stir in the beans, corn, vegetable juice, chiles, chili powder, and cumin and continue to cook until the mixture is heated through.

3. Spoon the bean mixture into the prepared baking dish.

4. Prepare the corn bread batter according to the package directions. Stir in the cheese and a small handful of cilantro or parley. Spoon the corn bread batter on top of the bean mixture in an even layer. Bake uncovered for 25 to 35 minutes, until the corn bread is cooked through and golden brown on top.

Monday, March 16, 2009

Pi Pie for Pi Day

March 14 was Pi Day! To commemorate the occasion, I baked a Pi Pie.


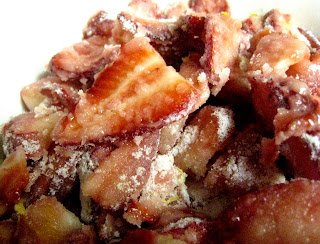
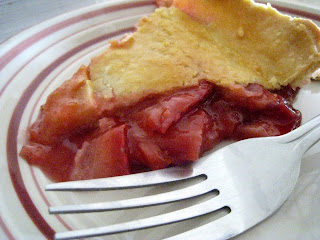
Seeing that I had picked up an extra large box of strawberries a few days before, which I knew I could never finish, but was such a good deal, I decided to use them in this pie. I used a rhubarb pie recipe, but just substituted the strawberries for the rhubarb.


The pie turned out very well. The crust was flaky and tasty and the filling was just enough strawberry flavored and a hint of citrus flavored from the zest.


I was going to wait for the entire pie to cool before having a slice, but I just couldn't help myself. I took a slice while the filling was still relatively warm. March 14 was also when my sister took her SATs. As a treat, I sliced a generous portion, popped it in a tubberware, and surprised her with it after she took the notorious exam. Needless to say, she was surprised and ended up finishing the slice before completing the 7 minute ride home.

Crust (My all-time favorite - I will probably use this crust forever!) - From Williams-Sonoma

Filling (From Betty Crocker Cookbook):

2 cups of sliced strawberries (I didn't really measure, but used all that I had)

2 cups sugar

2 tbls. flour

1 tsp. orange zest


Egg wash.

Directions:

1. Prepare the crust.

2. Divide the dough in half.

3. Preheat the oven to 400F.

4. Mix all the ingredients for the filling.

5. Roll out half the pie crust until 1/4 inch thick with a circumference of 1 inch greater than that of the pie dish. Line the pie dish. Trim any excess crust and add it to the other half of the dough.

6. Fill the crust with the filling.

7. Roll out the other half of the pie crust like step 5. Cover the pie with the dough. Trim any excess dough. Seal the two pie crusts by pinching and creating a border of your liking.

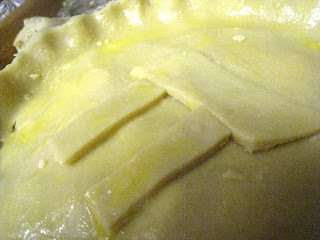
8. With any excess dough, roll out to 1/2 inch thick and cut out a pi symbol using a serrated knife. Of course, any other design may be trimmed out as well.

9. Make an egg wash by whisking one egg. Apply with a brush to cover the entire pie.

10. Bake for about 45 min. to 1 hour, or until crust is golden.

Wednesday, March 11, 2009

Toaster Oven Pita Pizza

Waiting for a recipe from a pictureless cookbook, you say? Well, here's the very first one!

Tonight was one of those nights when I just wanted something simple for dinner. I didn't want to buy anything from a fast food restaurant, but my refrigerator and pantry were not stocked very well either. I also didn't want to make something very time consuming because I wanted to catch Lie To Me. What is a girl to do under such strenuous conditions? Use it for inspiration for pictureperfectpassionphood, of course! I slowly turned the pages of The Healthy College Cookbook , hoping to find a non-time-consuming recipe whose ingredients were already in my destitute kitchen.

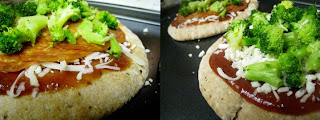
To my delight, I came across dinner! I had pita bread stashed away in my freezer, frozen broccoli florets, canned tomato sauce, some pepperoni slices, and plenty of cheese. I ended up making two pizzas - one for me, and one for my vegetarian sister. The meal was delicious, simple, quick, and best of all, you can pretty much throw anything on top of it.

Toaster Oven Pita Pizza submitted by Patricia Hancock from Hawthorne, New Jersey to The Healthy College Cookbook:

1 whole-wheat pita (or more, depending on how many pizzas you're making)
1/4 cup tomato sauce (per pizza)
Handful of shredded mozzarella (or any type cheese you like)
Toppings of your choice (vegetables, pepperoni slices, and so on)

1. Preheat the broiler of your toaster oven.

2. Place the pita on a toaster broiler pan. Spread the sauce on top of the pita. Sprinkle with cheese and add the toppings. Place in the toaster and broil until the cheese is melted. Eat hot.

Tuesday, March 10, 2009

Some Desk Clearing


Everyone in the department I work in is doing a little desk clearing. Consequently, a designated area (on top of the microwave in the common area, to be exact) has been created for unused stuff that everyone's finding in the back of their drawers. All items in this area are free for anyone to take. So, of course, I ran over as soon as I found out to see if there were any treasures left behind. Sure enough I found a few unique items that I don't think I will be able to find anywhere else.


The above mug is promoting one of our instruments. Notice the unique shape of the handle with the rotating dollar sign.


Also, take a look at the thermos/canteen combination. It's shaped like a thermos and made of a material used for canteens. It even has a compass attached to the screw in lid and a clip for easy attachment. This thermos/canteen will be the perfect complement to the swiss army knife that I gave to my sig-o last year when I took a trip to Austria.

My First Disney Pin!


Needless to say, I am a Disney fan! After many many days of debating and researching, my sig-o and I got our first premium annual passes to Disneyland, which also works for Disney's California Adventure as well. It has turned out to be a great decision. It has allowed us to get several discounts at various vendors around the parks and we get to enjoy the parks leisurely. Since Disneyland now gives free admission to visitors on their birthdays, I will be looking forward to using my gift card worth the admission ticket value (as opposed to an actual admission ticket because I already have the annual pass).

Everytime we go to Disneyland, I consider becoming a Disney pin collector. However, everytime I turn the pins over and match the color code to the price, I put the pin down and reconsider for the next time I visit. I have visited disneypins.com to try to get a better understanding of what collecting pins really means. I was unable to justify why anyone would buy a pin just to trade it. I came to the conclusion that people must receive pins (that they wouldn't necessarily buy for themselves) as gifts and they end up trading those.

On one of our trips to Disneyland, we decided to ride on It's a Small World to check out their new additions of the Disney characters. To my surprise, my favorite princess, Cinderella, was there, pumpkin, mice, and all! After the ride, we decided to do a little shopping and the Cinderella pin from the It's a Small World Collection was calling my name. It was the only one that stood out to me out of the entire pin display rack! I decided right then and there to only buy pins to have them, and not necessarily to trade them. Which brings me to the beautiful pin depicted above.

Katie's Birthday Cupcakes


This past weekend was Katie’s, one of my oldest friends, birthday. I’ve known her since the 4th grade! To commemorate the occasion, I decided to bake her a few cupcakes. I had imagined cupcakes frosted with lavender colored vanilla frosting and white swirls all over its surface. What I ended up with was not exactly what I had planned.

Let me first point out that the yellow cupcakes turned out very well. They were moist and tasty.


The problem came when making the frosting. You see, being my stubborn self, I decided to deviate from the instructions of making the frosting. Instead of adding confectioner’s sugar to the butter and then slowly adding milk, I decided to mix the butter and milk first and then slowly add the sugar. I got this idea from a royal icing recipe that I had once made. That royal icing turned out superbly well, but apparently there’s a difference in making frosting and making royal icing. Before adding food coloring to the frosting, it looked the way it was supposed to. However, once those colorful droplets hit the mixture, ahhh! The frosting had a consistency like that of curdled cheese! Perhaps the frosting could have gotten that way from too much mixing? After a taste test, I decided to use the frosting and see what I could make of it. The swirls didn’t work out as I would have liked merely because I couldn’t find the fine tip that I thought I had. Thus, personalized cupcakes had to have sufficed. When I got to the party, no one seemed to know the difference. All’s well that ends well.

My problem used to be making cakes that were too dry and frostings that made the cake look better than it tasted. After this incident, it seems to be the opposite. With words of encouragement, my sig-o told me that since I already know how to make non-curdled frosting, I just need to combine it with this moist cake experience to bake the perfect cake next time!

Both starlight yellow cake and vanilla buttercream frosting were from "Betty Crocker's Cookbook".

**Learn from my mistake and follow the directions for the frosting**

Starlight yellow cake:

2 1/4 cups all-purpose flour
1 1/2 cups sugar
1/2 cup butter or stick margarine, softened
1 1/4 cups milk
3 1/2 teaspoons baking powder
1 teaspoon salt
1 teaspoon vanilla
3 large eggs

Heat oven to 350 degrees. Line cupcake pan with cupcake liners.

Beat all the ingredients with an electric mixer on low speed for 30 seconds, scraping bowl constantly. Beat on high speed 3 minutes, scraping bowl occasionally. Pour into cupcake liners until 2/3 full.

Bake for 20 - 25 minutes or until toothpick inserted in center comes out clean or until cake springs back when touched lightly in center. Cool in pan for 10 minutes, remove from pans to wire rack. Cool completely, about 1 hour.

Vanilla Buttercream Frosting:

3 cups powdered sugar
1/3 cup butter or stick margarine, softened
1 1/2 teaspoons vanilla
1 to 2 tablespoons milk

Mix powdered sugar and butter in medium bowl with spoon or electric mixer on low speed. Stir in vanilla and 1 tablespoons of the milk.

Gradually beat in just enough remaining milk to make frosting smooth and spreadable. If frosting is too thick, beat in more milk, a few drops at a time. If frosting becomes too thin, beat in a small amount of powdered sugar.

Wednesday, March 04, 2009

My Ingredients - What I'm Made Of

Check out my new ingredients, here.

Hi!

I'm Patty. I'm a sister, a friend, a sig-o, a chemist, a student, a housekeeper, an unofficial baker, and an unofficial cook.

I'm starting this blog for a lot of reasons...I get so frustrated when I buy cookbooks that don't have any pictures in them. For the untrained cooks and bakers, like myself, how are we supposed to know what it's supposed to look like? What is our ultimate goal? With my posts, I'm hoping to be able to help those who have pictureless cookbooks by working my way through pictureless recipes. Of course, each recipe will be up for interpretation, but I will do my best.

Undoubtedly, I will be trying recipes that I find intriguing, but not necessarily from pictureless books. I hope those recipes will peak your interests as well.

The first book that I will attempt to work through is Healthy College Cooking. It is a book that I was recently published in! One of my recipes that I had submitted, which I will post later, was chosen along with other college students' recipes as part of a contest. One of the prizes was a copy of the book. Though it was a very exciting day when the book landed on my doorstep and I am very supportive of its concept, I was mildly disappointed when I flipped through the book and found absolutely no pictures! Hence, the birth of pictureperfectpassionphood! One of my primary goals will be to slowly chug through the book and provide pictures for those recipes, or at least my take of them.

I am also starting this blog to be able to keep in touch with old friends so that if one day I run into an old friend, he/she won't be able to say, "What? You had five kids?" Of course, I am also hoping to make new friends along the way with pictureperfectpassionphood.

Besides recipe posts, I will be sharing some of the exciting and not so exciting events that go on in my sometimes small world.

Please feel free to comment and leave suggestions, as this is the first time I have ever attempted to share a little bit of me.