Sunday, May 31, 2009

Great American Bake Sale

Brace yourself. It's a long one! I decided earlier this spring to put on a bake sale to support Share Our Strength. They are an organization that helps fight against childhood hunger by donating proceeds to after-school programs and summer feeding programs in local neighborhoods.
I chose the location - my generous friend's house in Redondo Beach! Katie and I work in the same company and she welcomed the idea - bless her heart! Once I chose the location, I had about three weeks until the actual bake sale day. Being the sporadic procrastinator that I am, I chose this event to wait until the last week to prepare everything (posters, labels, promotion, items for sale).

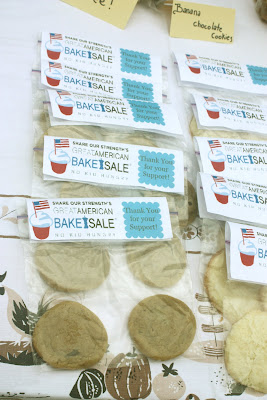
The week leading up to the Saturday of the event, I got very little sleep. My week was full of late nights cutting and pasting paper, baking prep, and designing. I had decided early on to make the event donations only, so I didn't have to worry about pricing each item. Each night was a different item - poster (check), cookie dough and pre-baked brownies (check), cupcake filling (check), cupcakes (check), toppings (check), cookie bag labels (check).
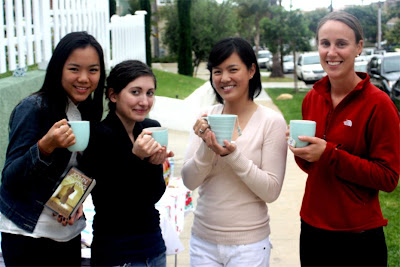
Finally, the day before the event came. After a week full of sunshine, Friday had to be the quintessential May gray. WHY??? It's ok...this is LA; temperatures change all the time - one day it's sunny and the next it's raining. Maybe, just maybe, tomorrow will be a beautiful day for a bake sale at the beach. Nope. It was gray pretty much until the end of the bake sale. There was a little condensation in the morning, but thank heavens that subsided. The rest of the day was chilly and overcast, but surprisingly, that didn't stop the foot traffic, even though we were in a residentail neighborhood.
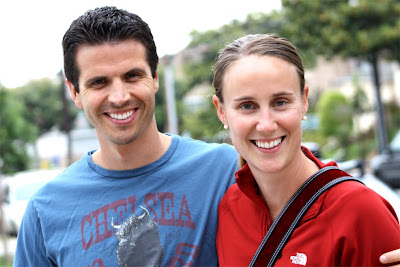
Overall, considering the weather conditions, considering the quiet residential neighborhood, considering the average 4-5 hours of sleep I got each night, considering my aching, almost feverish body by the end of the event, we did really well - 50% over my goal! That made all the hardship just melt away. It was an amazing, rewarding, and fulfilling day.
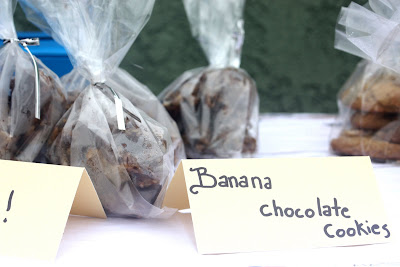
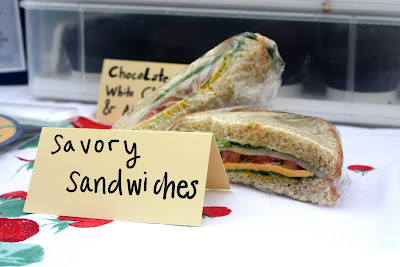
For this event, I baked chocolate chip cookies; sugar cookies; brownies; vanilla cupcakes with vanilla pastry cream, topped with a strawberry; yellow cake with mango mousse filling, topped with ginger-lime creme; and chocolate cupcakes, filled with white chocolate mousse, and topped with sour cream chocolate almond frosting. We also offerred made to order sandwiches for those without a sweet tooth. All the recipes will be shared in due time (patience is a virtue).
There was absolutely no stinkin' way I could have pulled this off on my own. I had loads and loads of help. I would now like to take the time to thank each and everyone who helped.
Katie - thank you for loaning me your kitchen, front yard, sidewalk, and topless table. Also, thank you for offering to put up the signs for me around the neighborhood - it saved me so much time. Lastly, thank you for your suggestions and promotion of the event.
Sig-O - thank you for your words of encouragement and your support. Thank you for staying up with me to help me finish the last minute preparations. Thank you for helping me set-up and tear-down the event. Thank you for doing my shopping and being the short order cook. I definitely wouldn't have been able to do any of this without you there by my side. Whenever I had a problem, I new that you were the one to turn to.

May - thank you for your beautiful greeting cards. Your attention to detail is impecable and I always enjoy your work. Also, thank you for taking time out of your busy day and driving out of your way to make it to the event. Lastly, thank you for staying until the end to help with clean-up.
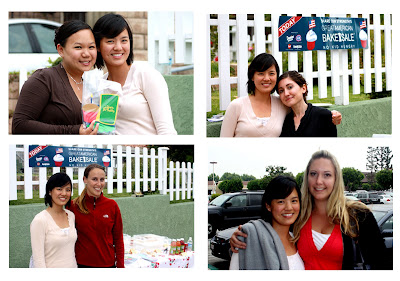
Amy - thank you for baking such delicious and popular no-sugar added banana cookies and chocolate chip, marshmallow cookies. Thank you for driving that whole hour just to be at the event. Thank you for staying for most of the event, even though you had another event to go to. It was great seeing you again and catching up.
Sister - thanks for being the tongs girl and serving each delicate cake with care. Thanks for keeping us entertained and for sharing in this event with me.
Stephanie, Pru, Patrick, and Lawrence - thank you so much for donating even though you knew you couldn't make it. Your donations helped me meet my goal that much quicker. Knowing that you supported the cause really meant a lot to me.

Of course, the customers! Thank you so much for your support and for trusting in a local neighborhood sale. You were all so hospitable and I enjoyed visiting with every one of you. Without you, this wouldn't have been the success that it was.




Saturday, May 23, 2009

Katie's Graduation Cupcakes

'Tis the season of graduations! If you've been out of the house over the recent weeks, you may have noticed that every window display have similar themed displays: grads, graduations, etc. Well, I certainly have my share of commencements to attend this year, with great pride of course. I, myself, graduated last year, which was a bittersweet event simply because it meant that because I was at my own ceremony, I couldnt' be at my friends'. Well, thank goodness for those who took their time. I will get to attend three, count them, 1-2-3! graduations and I will be taking the liberty of providing the desserts for every single one of them.
The first diploma will be granted to Katie, with a Bachelor's in business management. I am particularly proud of Katie because she has accomplished so much for herself. She's able to put herself through school while working two jobs and having a social life. She never let any circumstances hold her back from reaching her goal. She plans to achieve an MBA in the near future and go into marketing.
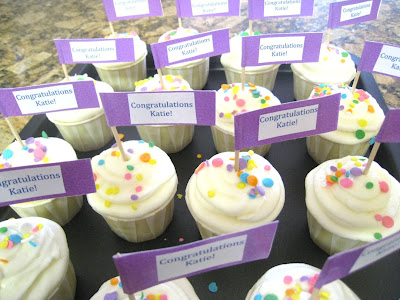
For her graduation party, I kept the theme of the condiment cups, which I so much enjoy using. The cake was my, now redundant, vanilla buttermilk cake, and a traditional buttercream frosting. I had some candied confetti left over from a previous project and this was the perfect time to break them out. As you can see, I did not need very much of it. I still have plenty left over from the little salsa container it is kept in to be used in the future.
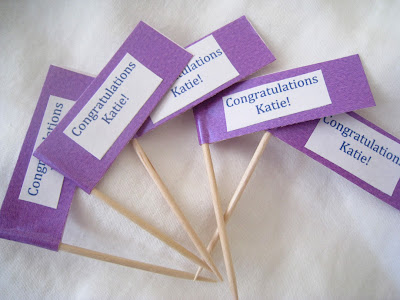
I've been dying to make some kind of flags to label my cupcakes ever since...oh, so long ago. Every time I wanted to make them, I some how ran out of time so only the unadorned guest of honor got to arrive. Not this time! I'd waited long enough to make flags and this time it was going to make its shining debut. I was able to finish them quickly because my sister unobjectively typed up the text and helped me assemble these dainty labels. Like an assembly line, I cut the strips of text and construction paper and passed it along the "conveyer belt" to my sister for gluing around the toothpick. Fifteen minutes later...Ta-da!
You don't actually think I came up with this particular design on my own, do you? Well, you would be correct. Find the instructions below.

The overplayed Vanilla Buttermilk Cake, adapted from Smitten Kitchen

3 3/4 cups cake flour
2 1/2 cups sugar
1 tablespoon plus 2 3/4 teaspoons baking powder
1/2 teaspoon salt
2 1/2 sticks (10 ounces) unsalted butter, at room temperature
1 1/4 cups plus 1/3 cup buttermilk
5 whole eggs
2 egg yolks
2 1/2 teaspoons vanilla extract

1. Preheat the oven to 325°F. Line a cupcake pan with paper liners or, if you would like to go without the liners, grease the pans with shortening, butter, or non-stick cooking spray

2. Combine the cake flour, sugar, baking powder, and salt in a large mixer bowl. With the mixer on low speed, blend for 30 seconds. Add the butter and 1 1/4 cup of the buttermilk. Mix on low speed briefly to blend; then raise the speed to medium and beat until light and fluffy, 2 to 3 minutes.

3. In a smaller bowl, whisk together the whole eggs, egg yolks, vanilla, and the remaining 1/3 cup buttermilk until well blended. Pour one-third of the egg mixture into the cake batter at a time, folding it in completely after each addition.

4. Fill the cups 2/3 full with the batter.

5. Bake for 18-20 minutes or until a toothpick inserted comes out clean.

Buttercream adapted from Wilton

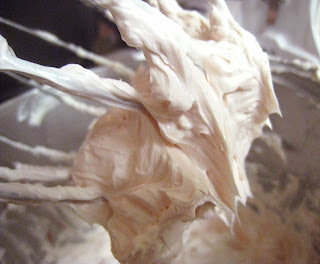
I actually modified this recipe a little bit. From experience, I feel that the amount of confectioners' sugar makes the buttercream very dry. This time, I wanted to achieve a smooth and soft topping. To adjust for this, I omitted the milk and simply added the sugar one tablespoon at a time. The result was a less concentrated, silky smooth frosting, reminicent of a sweet meringue.

If you've never tried buttercream before, try this recipe excactly and see how you like it.

1/2 cup solid vegetable shortening
1/2 cup (1 stick) butter or margarine softened
4 cups sifted confectioners' sugar (approximately 1 lb.)
2 tablespoons milk
1 teaspoon clear vanilla extract

(Medium Consistency)

In large bowl, cream shortening and butter with electric mixer. Add vanilla. Gradually add sugar, one cup at a time, beating well on medium speed. Scrape sides and bottom of bowl often. When all sugar has been mixed in, icing will appear dry. Add milk and beat at medium speed until light and fluffy. Keep bowl covered with a damp cloth until ready to use.

For best results, keep icing bowl in refrigerator when not in use. Refrigerated in an airtight container, this icing can be stored 2 weeks. Rewhip before using.

For thin (spreading) consistency icing, add 2 tablespoons light corn syrup, water or milk.

For Pure White Icing (stiff consistency), omit butter; substitute an additional 1/2 cup shortening for butter and add 1/2 teaspoon No-Color Butter Flavor. Add up to 4 tablespoons light corn syrup, water or milk to thin for icing cakes.

Flags adapted from Une-Deuxsenses

I stumbled upon this blog a few weeks ago and I've been following it ever since. The uniqueness of her blog comes from sharing all of her interests on one site.

Sunday, May 17, 2009

A Little Revamping and Michelle's Baby Shower Cupcakes

My dear followers, if you've been with me from the beginning, you may have noticed that my recent posts have strayed away from my original "mission statement". Consequently, it is now time for me to revamp to my CURRENT purpose.
The intent of this blog will be to share to you my journey as I venture and explore the world of baking. I anticipate some sprinkles of cooking and other tidbits of my life, but there will probably be more oven usage than anything else. I simply get inspired to bake more than I get inspired to do anything else. My creativity, the little I have of it, usually channels toward improving cakes, cupcakes, etc.
With that said, take a look at Michelle's baby shower cupcakes.
Michelle, a co-worker, was about to leave for maternity leave and the department threw a baby shower for her little girl that was about to grace us with her presence in a few weeks. It was a potluck shower and I saw it as an opportunity to bake something (doesn't everyone see it that way?).

I baked cupcakes, but instead of using regular liners, I used condiment cups that you could find at a fast food restaurant (no, I did not raid fast food restaurants for these cups). I found that they held well and I was able to make a good amount at the same time, because, unlike cupcake pans, I was able to bake as many cups as I could fit on a cookie sheet at a time. They were not limited by a pan. I just needed to fill and pop in the oven.

I used my favorite vanilla buttermilk cake (I promise, new recipes soon) recipe and a swiss buttercream frosting. I tinted the frosting pink and used a star tip for the piping.

Vanilla buttermilk cake
Adapted from Smitten Kitchen

3 3/4 cups cake flour
2 1/2 cups sugar
1 tablespoon plus 2 3/4 teaspoons baking powder
1/2 teaspoon salt
2 1/2 sticks (10 ounces) unsalted butter, at room temperature
1 1/4 cups plus 1/3 cup buttermilk
5 whole eggs
2 egg yolks
2 1/2 teaspoons vanilla extract

1. Preheat the oven to 325°F. Line a cupcake pan with paper liners or, if you would like to go without the liners, grease the pans with shortening, butter, or non-stick cooking spray

2. Combine the cake flour, sugar, baking powder, and salt in a large mixer bowl. With the mixer on low speed, blend for 30 seconds. Add the butter and 1 1/4 cup of the buttermilk. Mix on low speed briefly to blend; then raise the speed to medium and beat until light and fluffy, 2 to 3 minutes.

3. In a smaller bowl, whisk together the whole eggs, egg yolks, vanilla, and the remaining 1/3 cup buttermilk until well blended. Pour one-third of the egg mixture into the cake batter at a time, folding it in completely after each addition.

4. Fill the cups 2/3 full with the batter.

5. Bake for 18-20 minutes or until a toothpick inserted comes out clean.

Swiss Buttercream Frosting
Adapted from Smitten Kitchen

1 cup sugar
4 large egg whites
26 tablespoons butter, softened (3 sticks plus 2 tablespoons)
1 teaspoon vanilla extract

Whisk egg whites and sugar together in a big metal bowl over a pot of simmering water. Whisk occasionally until you can’t feel the sugar granules when you rub the mixture between your fingers.

Transfer mixture into the mixer and whip until it turns white and about doubles in size. (Here’s a tip: when you transfer to the mixer, make sure you wipe the condensation off the bottom of the bowl so that no water gets into the egg whites. This can keep them from whipping up properly.)

Add the vanilla.

Finally, add the butter a stick at a time and whip, whip, whip.

I tinted the frosting with a few drops of red food coloring. You could do the same with food coloring gel or powder. Just add the tiniest amount of coloring incrementally, until the desired color is achieved, making sure to allow for a complete mixture after each addition.

Sunday, May 10, 2009

Anne-Marie's Birthday Cake


It was our (my sig-o and I) friend's, Anne-Marie, birthday. She was holding the celebration at a club in Downtown L.A. I decided to bake her a miniature cake to commemorate the occasion. I had high hopes of how it was going to turn out. I ended up throwing the initial batch away because of a leveling mishap. In a fury of disappointment and anger, I stormed half way up the stairs (despite the comfort my sig-o tried to console me with) and then decided to come back down to try it again. I had extra batter and knew that if I didn't at least try again, I would be in a foul mood for the rest of the night, which would be no fun for anyone.
It turns out the second time was the charm! Everything from the cakes to the frosting and decorating turned out the way I wanted and I was a happy camper. That is until we got to the club. Being my naive self and not clubbing very often, I quickly found out from the bouncer that they didn't allow any food in the club (why didn't I think of that?). Because it was downtown and we had parked our car a few blocks away to avoid paying unnecessary parking fees, I refused to put the cake back in the car. With no other choice, my miniature cake gift was left outside on a ledge with the bouncer all night long. I am pleased to say that by the end of the night, the cake was fine and left with its rightful owner to be devoured as a hangover food.
For the cake, I chose one of my favorite cake recipes. For the frosting, I bittersweetly admit that it was from a can. With limited time after coming home from work and still having to get ready for the event, I was unable to make the cake and the frosting all in the same evening.
Vanilla Buttermilk Cake adapted from Smitten Kitchen

Her recipe is for a larger cake. For a smaller cake like mine, simply halve or quarter all of the ingredients. I simply made the batter as is and saved the extra batter for future emergencies like this one.

3 3/4 cups cake flour
2 1/2 cups sugar
1 tablespoon plus 2 3/4 teaspoons baking powder
1/2 teaspoon salt
2 1/2 sticks (10 ounces) unsalted butter, at room temperature
1 1/4 cups plus 1/3 cup buttermilk
5 whole eggs
2 egg yolks
2 1/2 teaspoons vanilla extract

1. Preheat the oven to 325°F. Butter three 9-inch round cake pans. Line the bottom of each pan with a round of parchment or waxed paper and butter the paper.

2. Combine the cake flour, sugar, baking powder, and salt in a large mixer bowl. With the mixer on low speed, blend for 30 seconds. Add the butter and 1 1/4 cup of the buttermilk. Mix on low speed briefly to blend; then raise the speed to medium and beat until light and fluffy, 2 to 3 minutes.

3. In a smaller bowl, whisk together the whole eggs, egg yolks, vanilla, and the remaining 1/3 cup buttermilk until well blended. Pour one-third of the egg mixture into the cake batter at a time, folding it in completely after each addition. There will be 9 cups of batter; our 3 cups batter into each pan.

4. Bake for 26 to 28 minutes, or until a cake tester or wooden toothpick inserted in the center comes out clean.

5. Turn the layers out onto wire racks by placing a rack on top of a pan, inverting it, and lifting off the pan. Peel off the paper liners and let cool completely. When the layers have cooled, place a cardboard cake board on top of a layer, invert again, and lift off the rack. To make the layers easier to handle, wrap them on their boards completely in plastic, so they don’t dry out, and refrigerate them.

Chocolate frosting from Duncan Hines

To make the frosting easily spreadable, I microwaved the entire can and checked on it every ten seconds until I achieved the desired consistency.

Saturday, May 02, 2009

Restart Your Heart Cupcakes

At the beginning of the month I was hired to bake 30 cupcakes for a reception at Brimmer Street Theatre Company. The company was presenting a very neat play that I had seen the week prior. The setting of the play, Restart Your Heart, was at a wedding reception. Understandably, the client wanted cupcakes that had a wedding theme. He simply said, "white cake and white frosting". My mind ran wild with the vague description until I finally came up with what you see here.
This was my first attempt at making roses from buttercream, or roses at all, for that matter. It took me about 2-3 hours of practice before I finally felt confident enough to present them.
With the help of my sig-o, we carefully and strategically arranged them in the car, placing them on the floor of the back seat and schooching the passenger seat back to secure them in place. I drove carefully and delivered them with a nervous mindset. He had not seen them and I had not told him what I was planning to do. My only hope was that he liked them and realized how much time (2 days of practicing) I put into them because in the end, that's all that matters - that the customer is happy and I had something to do with it. He looked at them and said, "They're works of art!". With that said, my anxiety and exhaustion melted away.